Create Word forms that are easy to fill out
 You’ve probably received forms created in Word that are meant to be filled out and sent back. Sometimes, it’s so time consuming to get the document to “behave,” you end up printing it out, completing it in ink, and returning it to the sender as a scan. Here are a few techniques to make your forms, form-filler-friendly.
Start with Tables
When filling out forms, most people find boxes very helpful. So, start with a Table to give your form overall structure. From the Insert tab, click the Table button and select a starting number of columns and rows. You can always add more later. Create at least two columns, one for the field name and one in which to allow the filler to type his response.
Use borders
Instead of typing repeated underscores to get signature lines and the like, use a table, but customize the borders. Either on the Table Tools Design tab or on the Home tab in the Paragraph Group, you’ll see a Borders button (small grid). Click it once and choose No Borders to clear all existing borders. Click it again and choose Bottom Border. Voila! Signature line!
Document properties
Set up a Custom Document Property for repeating information, like Company Name in a contract form. Follow the steps for your version of Office below to get to Advanced Properties:
2007 – Office Button, Prepare, Properties, click Document Properties on Yellow bar, then Advanced Properties
2010 – File tab, Info, Drop down arrow Next to Properties on the right panel, then Advanced Properties
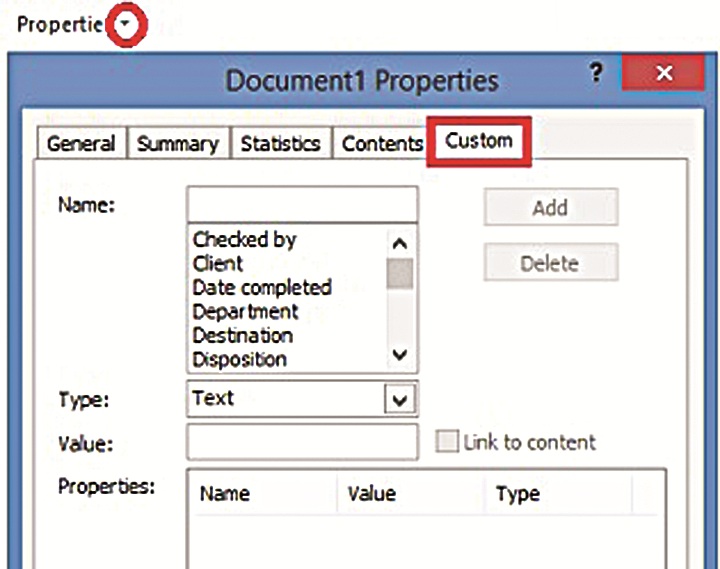
2013 – File tab, Drop down arrow Next to Properties on the right panel, then Advanced Properties.
Click the Custom tab on the Properties dialog box. Now, you can add a custom property like Company. You will need to give it a value, like “Your Company” in order to add it. Click OK. Now, on your form, place your cursor in the first spot where you want the filler to complete it. Click Quick Parts (Insert tab, Text group) and choose Document Property. Choose your new custom property from the list. After someone completes it once, it will be filled out anywhere else in the form you place it.
Form controls
Insert all other fields from the Developer tab in the Control group. Choose Plain Text controls for most fields to avoid crazy formatting choices. You’ll also notice a Calendar control, which is handy for date fields and a dropdown list, great for predefined choices. Once you select your control, click on the Properties button to set up any special characteristics, like length, format, or pick list choices.
Restrict editing
The final step to make your form fillable is to restrict editing to only form filling. This will lock the filler out of everything in your form except the fields. You’ll do this in Editing restrictions in the right-side task pane by checking the box and choosing Filling in Forms. Then, click the Yes, Start Enforcing Protection button and assign a password. Anytime you want to modify the form, you can “unrestrict” it with the password. So don’t forget the password.