Sane and simple sections, headers and footers
You can produce easily navigated documents with a few tricks: applying heading styles, inserting section breaks and using different headers and footers for those sections. These techniques work in both Office 2007 and 2010, and they are much easier to use than older versions of Office.
Styles
You may have considered styles too complicated to navigate in previous versions of Word. Now, they’re simple to use. And, if you only master Heading 1 and Heading 2, you open up great tools like tables of contents and use of the Navigation Pane (2010). Position your cursor in the middle of the text you’ve created for your heading. Then just click on the Heading 1 button. If you like shortcuts, try Ctrl+Alt+1, which will also make your text a Heading 1. For Heading 2, click on the Heading 2 button or try Ctrl+Alt+2.

Section breaks
You’ll find Section Breaks on the Page Layout tab. To insert a section or page break, look for Breaks in the Page Setup group. The dropdown menu will display both a Next Page and a Continuous Section Break. If you choose a Continuous Section Break, which appears in the middle of a page without causing a new page, the header for that page will be for the previous section, not the one you created. Use the Next Page Section Break for complex documents. Think of sections as chapters in a book. Work with Show/Hide button on to better manage breaks.

Headers and footers
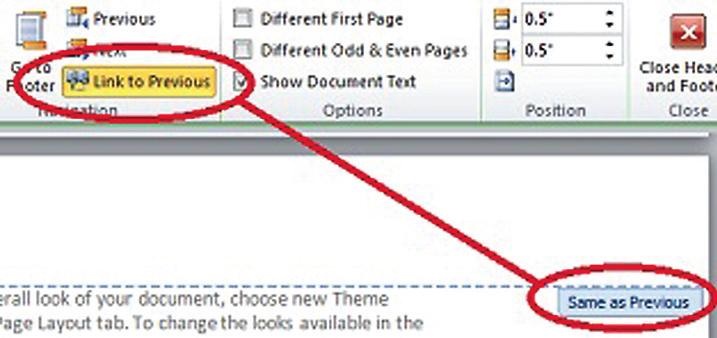
Now that you have Headings identified with Styles and you’ve inserted section breaks at the appropriate places in your document, you’re ready to deal with headers and footers. Go to Page Layout view and double-click at the top of the page to access the header area of your page. You’ll notice that the rest of the page slightly grays out and you’ll see a dashed separator where the header ends. You’ll see the Same as Previous indicator in each new section. To create a new header for this section, toggle the Link to Previous button off by clicking on it. Scroll down and click into the footer section. You’ll see the same options there. Use this to produce different page numbering for each section.
Navigation
With all the components in place, you can easily insert a table of contents and make use of the Navigation Pane (2010). On the References tab, click on the Table of Contents button and Insert Table of Contents. To use the Navigation Pane in Word 2010, be sure the check box is checked on the View tab in the Show Group.